
Learn how to Fix Umount Target is Busy Error in Linux by following the guide below.
Having a problem unmounting a file system in Linux? You may get an error telling you the umount target is busy. This means there’s still a file or process accessing the mount point.
To solve this, use the lsof command. It shows open files related to the mount point. Then, use the kill command to close any processes using these files. Last resort: restart your system.
It’s possible to encounter this error due to hidden processes. To prevent this in the future, make sure all apps/processes connected to the mount point are shut before unmounting.
Common causes of umount target is busy error
To identify and tackle the common causes of the umount target is busy in Linux error when attempting to unmount a directory, take a close look at the following sub-sections: Running processes using the mounted directory, An open file in the mounted directory, and A program accessing the mounted directory. These causes often overlap and learning how to deal with them can help you to tackle the issue.
1. Running processes using the mounted directory
If you’re trying to unmount a directory but keep getting a ‘umount target is busy’ error, there are a few steps you can take. Here’s a 5-step guide to identifying and stopping processes using a mounted directory:
- Type ‘lsof | grep /mnt/directory’ into the command line. This will show all processes that are accessing the directory.
- Note down the Process IDs (PIDs).
- Stop these processes with the command ‘kill -9 PID’ for each one.
- Try unmounting the directory with ‘sudo umount /mnt/directory’.
- If you still get an error, repeat steps 1-3.
There are other things to consider too. For example, running processes may take longer to complete than normal, so don’t mistake this for ‘stalled or hung mount points’. Additionally, check disk space, network connectivity and file system errors, which can influence ‘umount’ failures.
2. An open file in the mounted directory
When a file is open in a mounted directory, umount target may display a ‘busy’ error. This is because the operating system can’t unmount the filesystem until all the files are closed. Identify and close the open files to fix the issue.
If you can’t figure out which file is causing the problem, use the lsof command. It lists all open files in the directory with their processes. Carefully analyze the output and resolve the open files related to that directory.
Remember, active applications may still use the mounted share point even if no activity has been done for hours. This can cause ‘busy’ errors when trying to unmount them. Before unmounting, make sure no applications need the directory.
3. A program accessing the mounted directory
The “umount target is busy” error arises when a program is accessing a mounted directory. System cannot unmount it if that directory is in use, which may cause frustration and data loss. To fix this, follow these 6 steps:
- Run the lsof command to identify the program.
- Stop the program from accessing the directory.
- If that’s not possible, kill it using the kill command.
- Check no processes are using the directory with lsof again.
- Unmount the directory with umount.
- As a last resort, reboot the system.
Be aware that killing a process can lead to data loss. Whenever feasible, stop the program gracefully before unmounting. Check for open files or terminals on the shell too.
In conclusion, if an umount target error occurs, use lsof to find the program and stop/kill it. Then try unmounting the directory again. If all else fails, reboot the system.
Steps to fix umount target is busy error
To fix the umount target is busy error in Linux, you need to follow some simple steps with the help of which you can overcome this error. Initially, you should identify which process is using the mounted directory. Once you identify the process, terminate it immediately to continue with the unmount process. If it doesn’t work, use the “-f” option to force unmount the directory. Additionally, you can unmount the file system recursively. Lastly, you can use the lsof command to check the process accessing the mounted directory and then stop it.
1. Identify which process is using the mounted directory
To fix the ‘umount target is busy’ error, it’s important to find out which process is using the mounted directory. Here is a 4-step guide to identify it:
- Run the command:
$ mount, to view all mounted file systems. - Check if any users have open files or directories on the device. Execute:
$ lsof | grep '/mnt/point'. - Scan for processes with open files or directories attached to unmounted devices. Use:
$ fuser -cu /mnt/point. - If no active processes are found, try an unmount force operation by running:
$ umount -l /mnt/point.
Remember to look at User IDs before doing anything else. Unmounting a busy drive could cause data loss and system issues, so be careful when doing these steps.
2. Terminate the process using the mounted directory
Fixing the ‘umount target is busy’ error? No problem! Here’s what you need to do:
- Step 1: Find out which process is using the mounted directory. Run “lsof +D /path/to/mounted/directory” and note the PID.
- Step 2: Terminate the process with “kill -9 PID”.
- Step 3: Test if it worked by running “lsof +D /path/to/mounted/directory” again. If nothing shows, unmount.
But be careful! Abruptly terminating processes can lead to data loss or system problems, so take all necessary precautions.
3. Force the unmount using the “-f” option
Encountering the “target is busy” error while trying to unmount? You may need to force the unmount using the “-f” option. Here’s what to do:
1. Open Terminal: Navigate to Applications > Utilities > Terminal.
2. Identify & Locate Target: Type “sudo lsof | grep ‘/media'” and press enter. If nothing happens, move on.
3. Terminate Processes: Type “killall ‘processname'”. Replace ‘processname’ with the name you found in step 2.
4. Force Unmount: Enter “sudo umount -f /media/[drive]”. ‘[drive]’ is the mount point of your drive.
Note: This method terminates any process using that resource without saving data or changes. If multiple drives are mounted, repeat these steps for each drive.
4. Unmount the file system recursively
Unmounting a file system recursively means detaching it, even if it has subdirectories or files. This frees up resources and lets you do other things with the system. Here’s how:
- Check if any active processes are accessing the mount point with `fuser`.
- Try to unmount using `umount` if no processes are present.
- If you get the “target is busy” error message, use `umount -l` to force unmount.
- Repeat steps 2 & 3 until all subdirectories and files are unmounted.
- Confirm this with the mount command.
Forcibly unmounting can lead to data loss or corruption. So, use it as a last resort.
Also, make sure there are no applications or processes accessing files or directories inside the mount point before unmounting. Finding and stopping these applications is not covered here, but you can do it with lsof or fuser commands.
Follow these steps correctly and you can unmount the target file system without any problems.
5. Use the lsof command to find the process accessing the mounted directory
To deal with the ‘umount target is busy error’, locate the process accessing the mounted directory with lsof command.
- Open the Terminal. Execute ‘sudo lsof +D [directory location]’
- If any process is found, the name and PID will be displayed.
- Terminate the process via ‘sudo kill -9 [PID]’.
- Run step 1 again to confirm if the process was killed.
- Do steps 3-4 until no access is noticed.
Be careful! Terminating a process unexpectedly can lead to data loss or corruption. Additionally, only unmount once all processes are shut down, to prevent problems during unmounting.
Additional tips and recommendations
To ensure that you never encounter the ‘umount target is busy’ error again, incorporating additional tips and recommendations can be helpful. Two sub-sections to consider are preventing the error from happening in the future and creating an alias for the ‘umount’ command.
Preventing the error from happening in the future
To dodge similar mistakes in the future, introduce preventative measures to lessen errors and up productivity. Follow these six steps:
| 1. Scrutinize internal processes and detect vulnerable areas to mistakes. |
| 2. Set up processes to reduce human error, e.g. double-check data entry or compose checklists. |
| 3. Coach employees on technical skills required for a job. |
| 4. Use software or tech to automate repetitive tasks and diminish the chance of manual error. |
| 5. Do regular reviews of internal processes to guarantee they stay effective and current. |
| 6. Invite employee feedback to spot potential problems prior to them turning into major issues. |
Plus, consider teaming up with industry gurus or consultants who can offer an impartial appraisal of your organization’s operational procedures. On-going development is essential to cutting down the possibility of future errors and keeping high standards of excellence.
Creating an alias for the umount command
To quicken the unmounting process, set up an alias for the umount command. This saves time, as you don’t have to type out the term each time. Follow these steps:
- Open the terminal and write: nano ~/.bashrc
- Scroll to the bottom and add: alias unmount=’umount’
- Save and exit: Control + X, then Y, then Enter.
Now, use ‘unmount’ instead of ‘umount’. This can save you time.
Be aware that aliases can sometimes cause confusion or conflicts. Choose a unique alias, and avoid existing commands or functions.
Besides setting up aliases, there are other tips to improve your experience with file systems in Linux. For instance, learn about different file systems, like ext4 and NTFS. Additionally, explore graphical interfaces like GParted or Disk Utility. These can provide tools to manage partitions and volumes.
Frequently Asked Questions
Q: What does the error message ‘umount target is busy’ mean in Linux?
This error message means that the target you are trying to unmount is currently in use by a running process or has active files open.
Q: How can I identify which process or files are causing the ‘umount target is busy’ error?
You can use the “lsof” command in Linux to list all open files and their corresponding processes. You can then check which of these processes are associated with the target you are trying to unmount.
Q: Can I force the unmounting of a target even if it shows the ‘umount target is busy’ error?
It is not recommended to force the unmounting of a busy target as it can cause data loss or file system corruption. It is best to identify and close the running processes or files using the target before unmounting it.
Q: How can I safely unmount a target without encountering the ‘umount target is busy’ error?
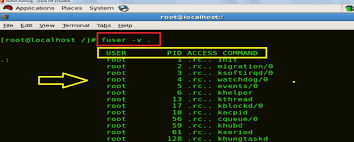
You can use the “fuser” command in Linux to identify and kill processes that are using the target, or alternatively, you can use the “lazy unmount” option (-l) to unmount the target when it is no longer busy.
Q: What other factors can cause the ‘umount target is busy’ error?
The error can also occur if there are network shares or other dependencies pointing to the target that has not been disconnected or removed.
Conclusion: ‘Umount Target is Busy’ Error Fix
To sum up, fixing the ‘umount target is busy in Linux’ error message is a tricky business. You need to spot and stop the processes using the target files. One way is to use the lsof command. This will show you the process’ PID, and you can stop it with the kill command.
Another method is to use the fuser command. It’ll show you the files/directories still in use. Then you can force-unmount them with umount -l. Also, make sure all users are logged out before attempting to unmount a filesystem.
It’s wise to check the filesystem before and after unmounting. This will help keep your data safe. In conclusion, having good know-how of Linux commands and processes is key to solving this problem.